

The best electrical setup for a van build or RV
We often see information on social media about van electrical set ups and we often get asked what we would recommend, so we’ve made this diagram to help you with the best set up. This is how we usually set up a rig if we were building it out and it’s based on the experience we have from trying different options over the years. This set up makes use of solar & power generated by the engine of your rig and enables you to be completely off grid, if you want to, and it’s also designed with the best safety tips possible for both you and the longevity of your equipment.
We don’t go into the detail of what size wiring & fuses you need to use because that is subjective to the size of your charging systems & how much power you’ll draw from your battery systems. Once you’ve sized up your charging system & how much load you’ll put on your battery system, you’ll need to size your cables & fuses appropriately. We’ll cover more on this in the coming weeks as it’s an important step, but we wanted to give an overview diagram of how we’d build out an electrical system in a van or RV.
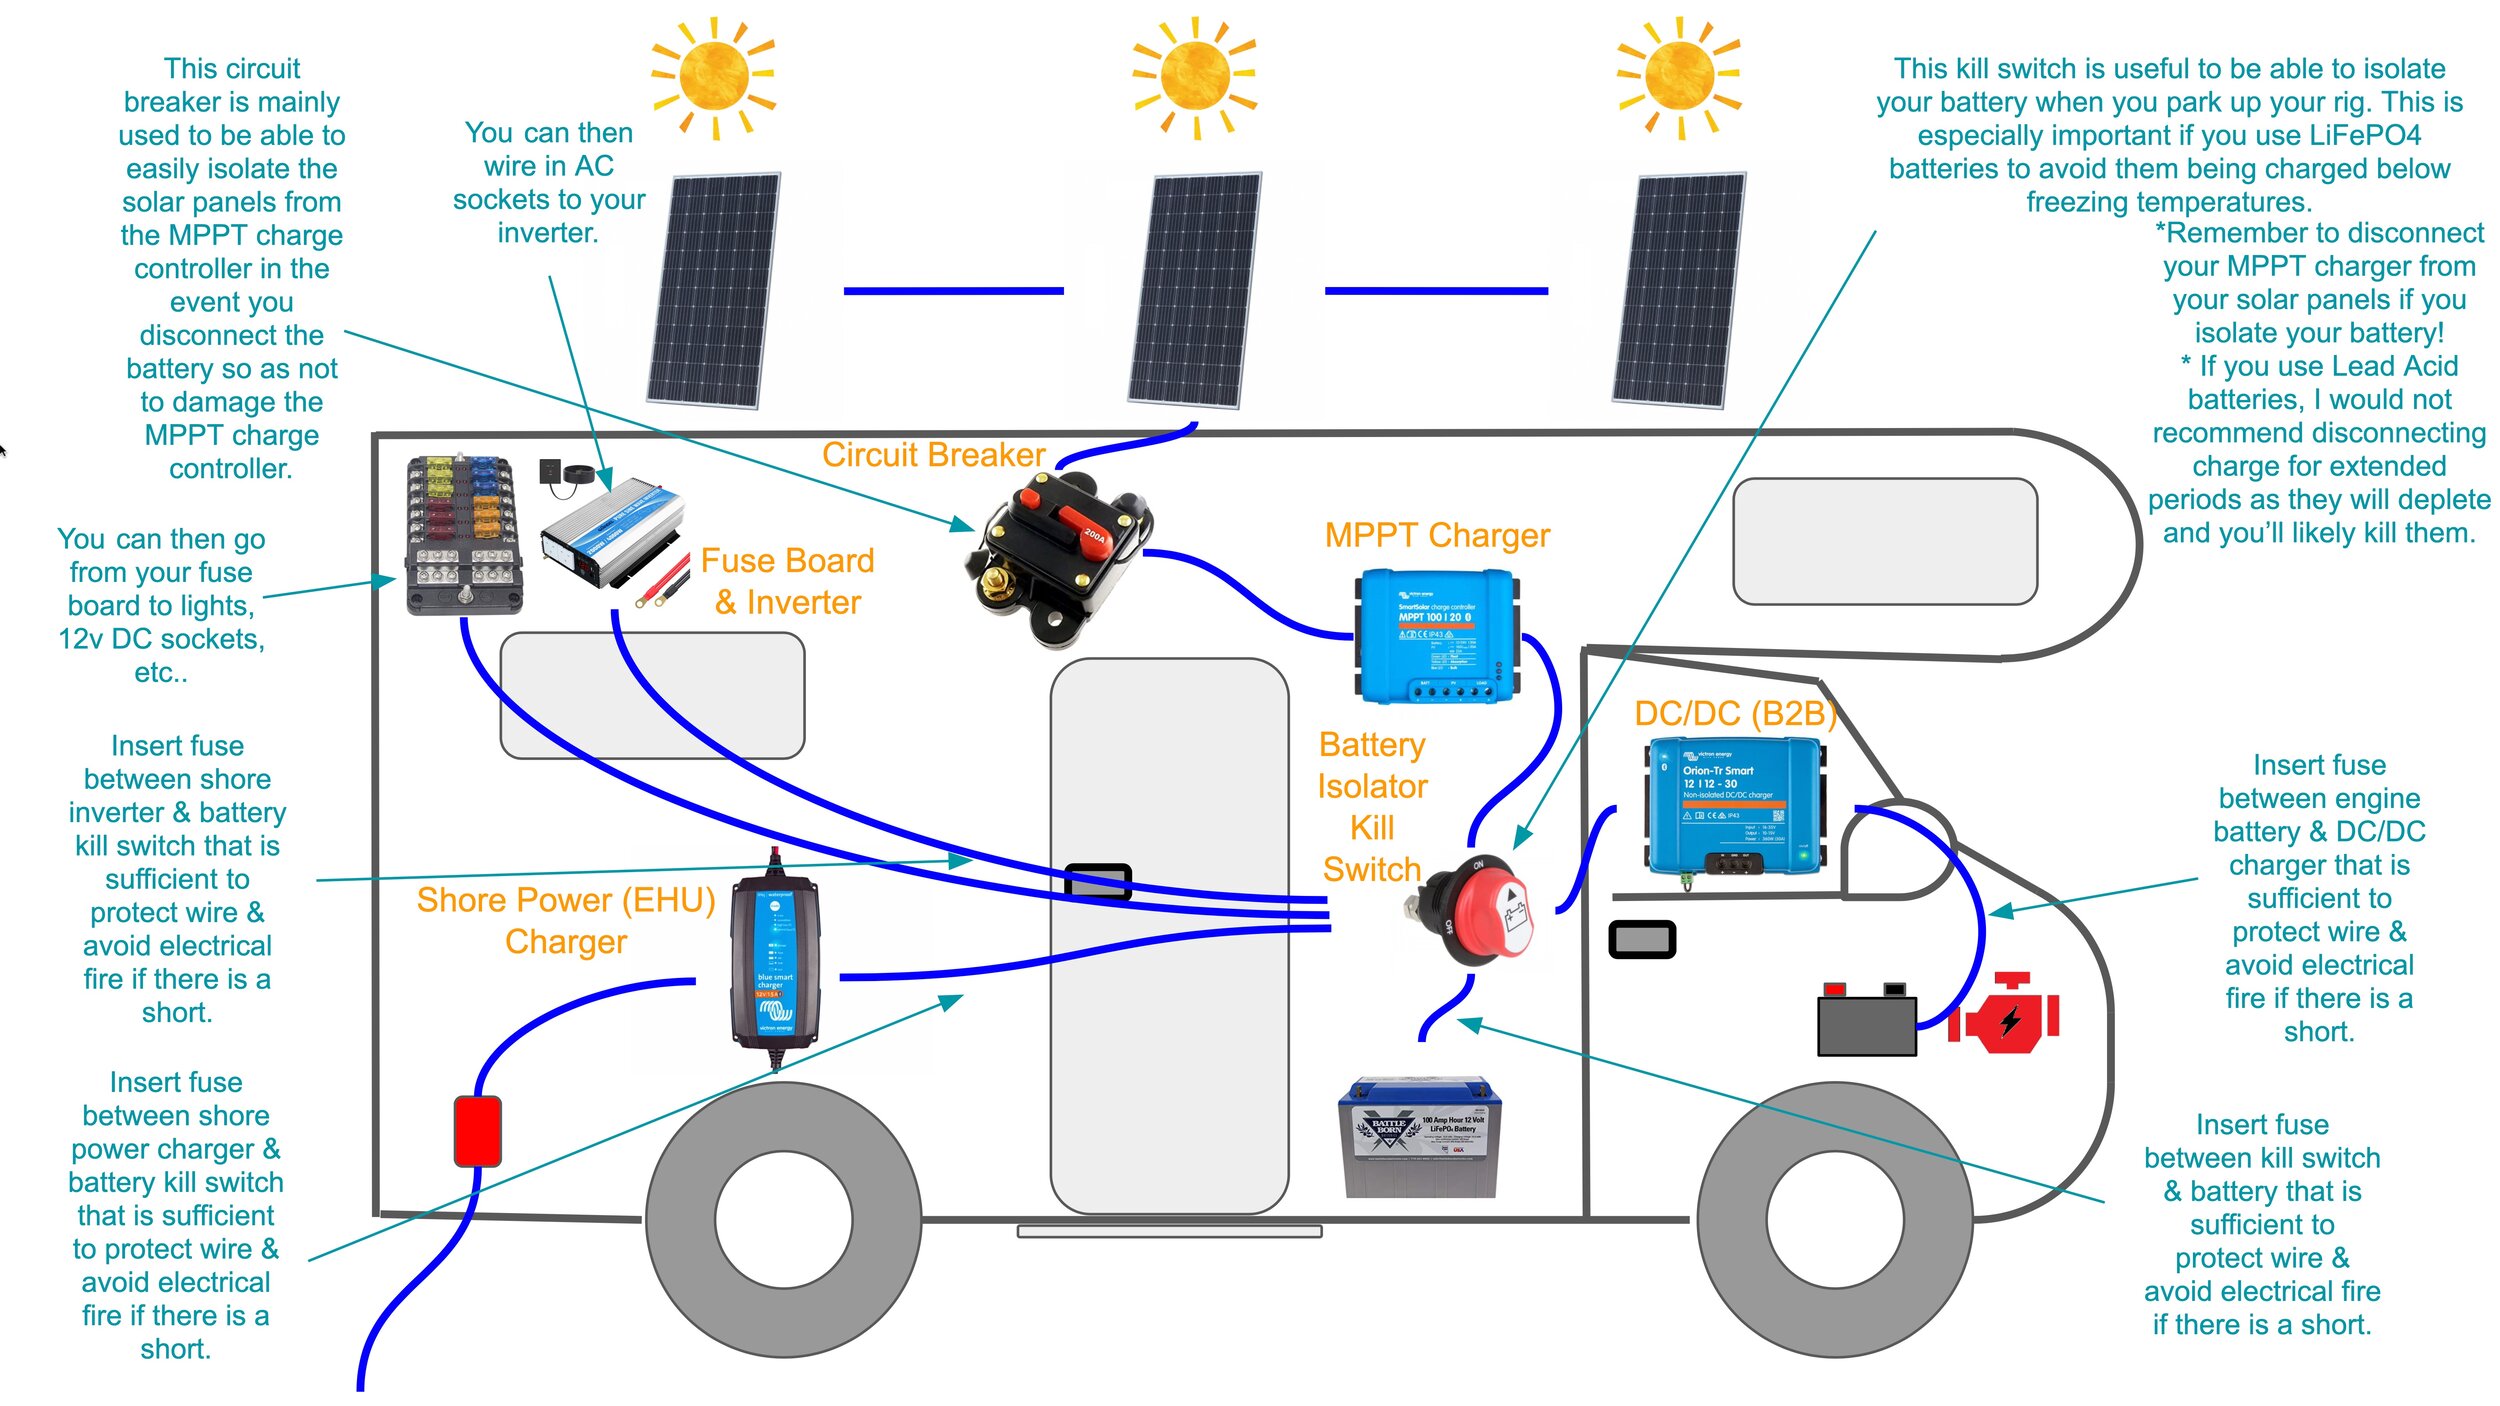
This is an overview of how we would set up a van or RV:
What’s the most important component of an offgrid system?
This really depends on where you live, where you will be using your rig and the time of the year you use your rig. For example, if you’re based in Northern Europe, where you don’t get a lot of sun in the winter, your DC/DC charger might be the most important component. If you’re in the mid west of North America, then your solar might be the most important. It also depends if you drive around every day or are completely stationary.
As a rough guide though, if budget is not a problem, we always recommend that you max out the amount of solar you can fit on your roof or that your MPPT charge controller can take. This means that even if you don’t have great sunlight, you’re still capturing the most energy possible.
We also recommend getting a reasonable sized DC/DC charger, such as 30A, so that even if you just drive for a couple of hours, you top your batteries up and put some charge back into them.
Some points to take note of:
All blue lines above represent cables to carry the current between the different elements. In some cases this might just be a positive cable as we’ll often use the vehicle’s chassis for a common earth (e.g. when installing the DC/DC charger, we just run a positive cable from the engine battery to the DC/DC charger and then a cable from the chassis to the DC/DC charger as the engine battery is always earthed to the chassis)
All circuit breakers, kill switches & fuses recommended in the diagram are placed on the positive cable in that stretch between the components shown.
DON’T USE SPLIT CHARGE RELAYS! If you want to extend the life of your leisure/house batteries, then we HIGHLY recommend using a DC/DC charger and NOT a split charge relay. When your engine is running, the voltage coming from your alternator will fluctuate quite a lot depending on how much charge is in your engine battery, how much current is being drawn for basic vehicle functions (lights, indicators, windscreen wipers, radio, AC, etc..) so the advantage of a DC/DC charger is that it regulates the current going to your leisure/house battery and will increase it’s lifespan. This is especially important for LiFePO4 batteries.
Electrical Components that we recommend:
Victron Energy SmartSolar MPPT Solar Charge Controller 100/50
Victron Orion Smart 30A 12V DC to DC charger with Bluetooth connectivity
Victron Energy Blue Smart Charger
Renogy 160 Watts 12 Volts Monocrystalline Solar Panel
Blade Fuse Block - spade fuse 12-Way
ROSENICE Car Fuse Holder Box (to place in all recommended places as per diagram above, except inverter)
FBL-400 Class T 400 Amp Fuse with Block (to be placed between battery isolator switch & inverter)
* Some of the links on this page contain affiliate links that generate a small commission for us if you click them.
If you found our RECOMMENDATIONS above helpful on building the best electrical system for your van or RV, then you MUST check out this blog post for some more helpful advice on how to choose an inverter for your van:

how to choose an inverter for your van build
If you’re trying to find the right inverter for your van, then this is the blog post for you!
We cover some of the aspects that you should think about when you’re trying to find the right inverter for your van build. How to size it, good reliable brands that we’ve used, etc..