
HOW TO FIX A STRIPPED TERMINAL ON A LIFEPO4 BATTERY CELL
If you've ever worked with cheaper LiFePO4 battery cells, you'll know the concern of stripping the threads in the battery terminal. Well, I sadly had this very experience recently and after much research and thought about it, figured I could fix it and document the process to be able to help you, in case you ever find yourself in the same boat.
There are really two options available to you:
Drill out the hole and tap a new (bigger) thread. This is probably the easiest, but will mean you have one terminal on your battery that has an M7 or M8 thread whereas the rest have M6. Some people choose to increase every terminal!
Drill out the hole, tap and new thread and insert an M6 helicoil. This is the option I went for, which I document down below.
The outcome that I had on this LiFePo4 battery was that I landed up with all my terminals having a working M6 thread, so they all matched!
HERE'S HOW YOU FIX YOUR LIFEPO4 BATTERY THREAD USING A HELICOIL IF YOU STRIP THE THREAD:
Firstly, here are the tools that I would recommend you'll need for this process:
Obviously, you could get away with using a hacksaw instead of an angle grinder and you could also get away with trying to drill out the stripped hole using a hand drill, but these are the tools that I would recommend that would be best to ensure success and also ensure that you don't damage the LiFePO4 cell any more.

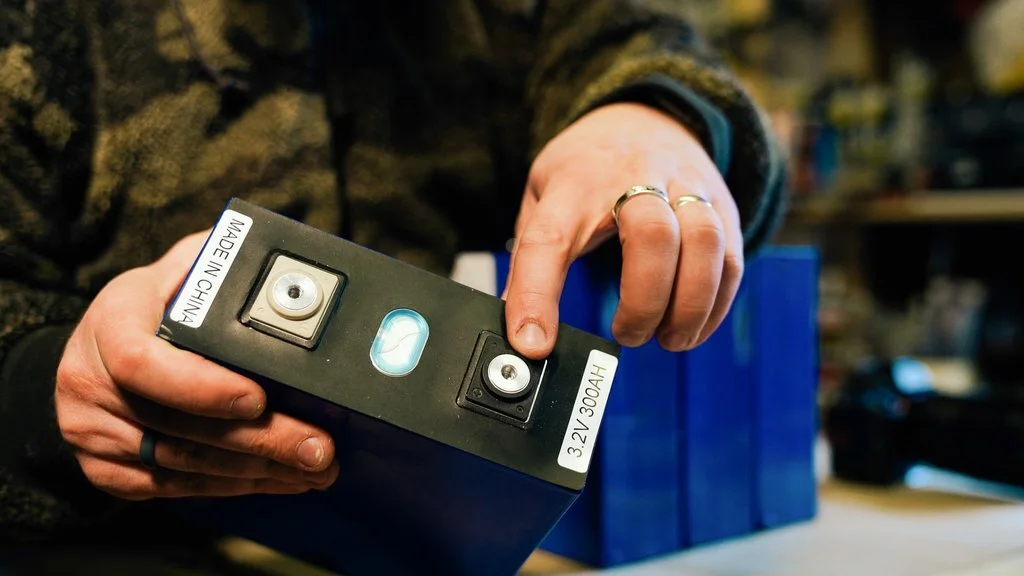
To start with, you're going to want to measure the depth of the shaft in your battery terminal. This is important as you'll be marking your drill bit and the tap from your tap & die kit later on when you drill the hole out to cut the new thread. I was using LiFePO4 battery cells from Dongguan Huanhuan Energy Technology Co. Ltd. and the terminal thread shaft measured just over 7mm in depth.


Next, you'll want to measure the height of the cells to the top of the terminal that you'll be drilling. This is so that you can get the height right for your drill press.

Once you know the height of your battery cells (including the terminals that stick out), you put your drill bit into your drill press and measure the height clearance that you need so that you can cut the drill bit.

Now that you've taken all the measurements you need to know, you are going to cut your drill bit shorter based on the mark that you made in the previous step. There are two possible reasons for the requirement of cutting the drill bit:
If like me, your drill press doesn't have enough clearance to fit the cell underneath before you press the drill down, then you'll need to cut the drill bit.
When finishing the widened hole you want the tip of the drill bit to be completely flat, and this is feasible because you're widening an existing hole instead of drilling from scratch. You have so little thread length anyway, so losing 1mm counts.
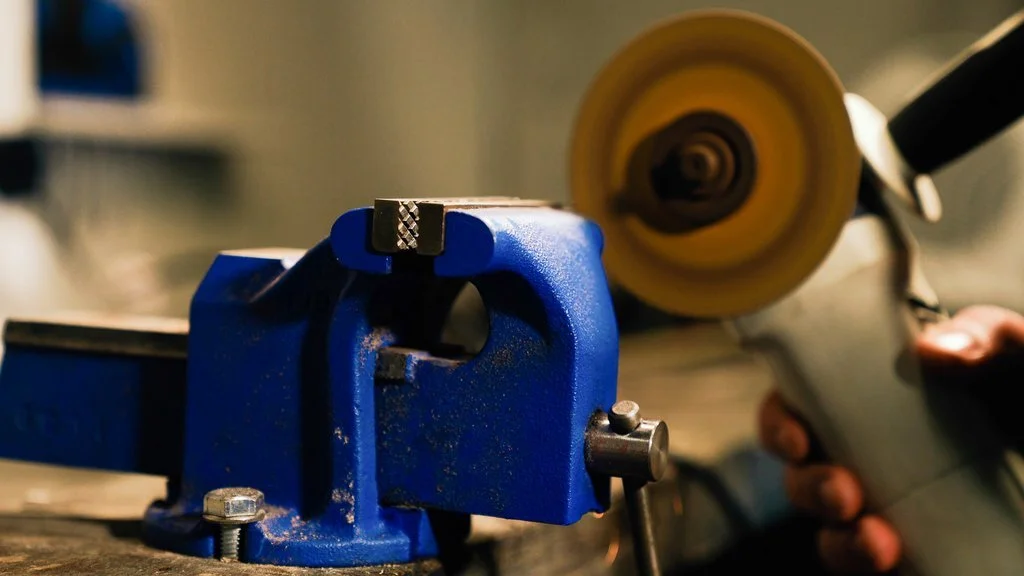

I used my bench grinder to ensure that the tip of the drill bit was completely flat because I didn't get it completely square when I cut it with the angle grinder.

After you've cut your drill bit down, you need to measure the drill bit to mark it with some tape so that you know how deep it has gone into the terminal shaft when you're drilling. I decided to mark mine slightly less than the original shaft was, so I marked it at around 5.2mm from the tip of the bit (bearing in mind the shaft in the terminal is 7.2mm).


At this point, you should be ready to drill out the terminal. Ideally, it would be helpful to have a second person with you when you're doing this to help spot. You need to be VERY CAREFUL not to drill too deep. If you drill out the bottom of the terminal, you can easily pierce the cell components and then permanently damage the cell. If you do this, you MUST discard the cell appropriately. DO NOT try to repair the cell if it is pierced!!
This is why I marked the drill bit with green tape so that I knew when to stop drilling. This is also the reason why I recommend using a drill press rather than a hand drill. You have much more control when you're using a drill press to ensure your hole is straight and also greater control in stopping when you need to so you don't go through the bottom of the terminal thread shaft.


As I was drilling the hole, I was stopping to check the progress and how it was looking a couple of times. It's important to do this step slowly and systematically.
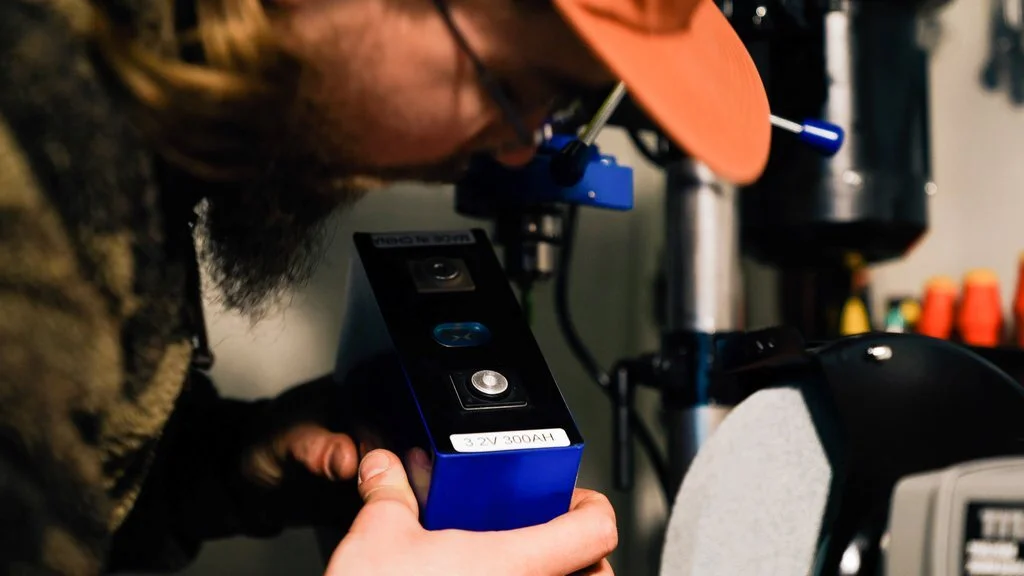
Once you've drilled out the hole, you should be ready to start cutting the thread using your tap from your tap & die kit. I just free-handed this and this is definitely a step that would have been much better to have someone with me to help me keep it straight and to spot for me.

After I had started the thread I took the tap to my bench grinder to grind the tip down. The reason I did this is that I don't want a curved tip (same as the drill bit) because you have such a short shaft that you're working with. It means that you have a solid thread all the way to the bottom of the shaft rather than a solid thread for the first couple of millimeters and then a weaker thread because the thread on the tap was tapering off.

I would recommend that you also measure the tap (like with the drill bit) to mark it so that you know how deep you've gone.


Again, it's helpful to have a second person with you to help spot and make sure you keep this straight (if you're freehanding it). The aluminium is very soft, so you need to be careful not to damage your new thread while you're making it.


I cleared out the hole using my air gun and it was looking good!


At this point, you'll be ready to thread the Helicoil into the new thread.

I measured the Helicoil to see how tall it was so that I knew how close it was to the bottom.

The length of the Helicoil matches the depth of the new hole that I had drilled. I started threading the Helicoil in. This is a pretty straightforward process. You just need to take care and watch that it goes in OK.

Once the Helicoil was in, I put an M6 grub screw into the Helicoil to test it to make sure it goes in OK.

Once I was happy that the Helicoil was in and the grub screw went in OK, I filed the top of the terminal down using a fine diamond file.

And finally, I put the grub screw into the Helicoil for the final time!

The finished product looked great and I'm stoked with how it worked out! I was able to torque a nut on the grub screw down to 5nM.


